
Touchscreen technology is becoming more and more common in consumer electronics. When designing these interfaces, achieving accuracy, as well as a fast time-to-market, is key. Using our Touchscreen Simulator demo app, we show you how simulation apps can aid in the design of capacitive touchscreen devices.
The Age of Touchscreen Devices
Consider modern consumer electronics, from smartphones and tablet computers to GPS and watches, and you will find a common thread: the growing use of touchscreen technology. Compared to the traditional way of interacting with devices, touchscreen interfaces offer greater flexibility, enabling access to context sensitive options and menus. This can result in a more intuitive and faster way of navigating available features. Touchscreen devices are further valued for their portability, as they remove the need for traditional input methods, such as a keyboard or mouse.
Among the different types of touchscreen technology, the most common form used in consumer electronics is the capacitive touchscreen. In anearlier blog post, my colleague Walter Frei explained the physics behind capacitive sensing. Let’s briefly recap some of the important concepts he discussed.
The Physics Behind Capacitive Sensing
In a capacitive touchscreen design, the key physical effect used for sensing is, fittingly,capacitance. Capacitance depends on electric potentials and electric fields.
Think back to the humble parallel plate capacitor from your high school physics classes. In its simplest form, such a capacitor consists of two parallel metal plates that are separated by a distance much smaller than their planar extent, with some insulative (or dielectric) material wedged between them.
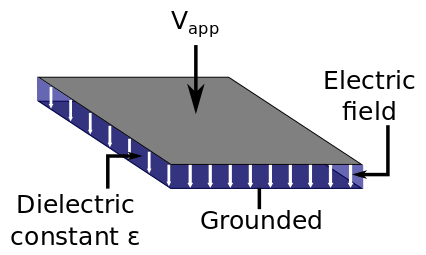
Schematic of a parallel plate capacitor showing the electric potential, electric field, and dielectric material.
Associated with this material is a dielectric constant, ε = εrε0. When the dielectric constant increases, the capacitance increases as a result.
Capacitance can be understood as a measure of the amount of energy that can be stored in the electric field between two conductive objects (or electrodes). A given electric field at each point in space has an energy associated with it. This energy is directly proportional to the dielectric constant of the material at that point.

Energy associated with given electric fields. Although the potentials and fields are equal for the same devices, one stores much more energy than the other.
Now imagine bringing a material of a large dielectric constant between two conductive surfaces (say, a finger). The capacitance between these electrodes will change. By measuring the change in capacitance in time, usually done by a circuit connecting the two electrodes, you can register the approach of the finger. The increase in capacitance will depend not only on the presence or absence of the finger, but it will also depend in some way on the location of the finger, with respect to the two electrodes. A capacitive touchscreen device thus typically employs a large number of electrode pairs, each with a particular finger location to capacitance curve to triangulate the position of the finger precisely.
From Theory to Practice: Touchscreen Design Considerations
You’ve now created a device that can register the “touch” of a finger and the location of the press. Unfortunately, the job is not quite finished yet.
Apart from addressing the question of where these capacitance to finger distance curves can be found, the question of accuracy still remains — an important consideration in the design of touchscreen devices. Consumer demand constantly calls for touchscreen devices that are more accurate and perform better. The added pressure of keeping up with competition can translate into the need for faster turnaround times for designs. To put this into context, let’s briefly consider some factors that can affect the accuracy of touchscreen devices.
The most obvious factor is the number of electrodes. Similar to the pixels in a digital camera, a greater density of sensors can result in an improved resolution of spatial information (up to a limit, naturally). You might also consider changing the materials used in the dielectric layers surrounding the electrode grid or altering their thickness. This will change the “base” capacitance against which changes in capacitance are measured.
The parameters mentioned here are just some of the factors that the designer has some level of control over. What about those elements that cannot be controlled? Some examples include the angle at which the finger approaches the device, whether or not the finger is wet, and how hard the screen is pressed. You may even want to explicitly account for the last variable, mostly to provide additional functionality (different behavior for hard and soft presses).
Accounting for all of these parameters can seem like a daunting task, especially given the high electrode densities required to meet expected accuracy levels in modern electronics. This is particularly true when you’re in a race with competitors to get the next generation of optimized devices to the market.
With simulation apps, you can resolve such issues in a straightforward and efficient way. Our Touchscreen Simulator demo app — new in COMSOL Multiphysics® software version 5.2 — offers insight.
How Apps Help Optimize the Design Workflow
Say you have built a complex touchscreen device model in COMSOL Multiphysics. With the Application Builder, you can turn your model into a simplified app that includes only those parameters that are essential for users to get the results that they need.
As the app designer, you have the flexibility to control which parameters, plots, and options can be accessed and modified. You can easily make such selections using theForm Editor, a tool that makes it simple for you to set up your app’s user interface (UI). For more advanced functionality that is tailored to solving a specific problem, you can turn to theMethod Editor, which enables you to add nonstandard features through the Java® programming language.
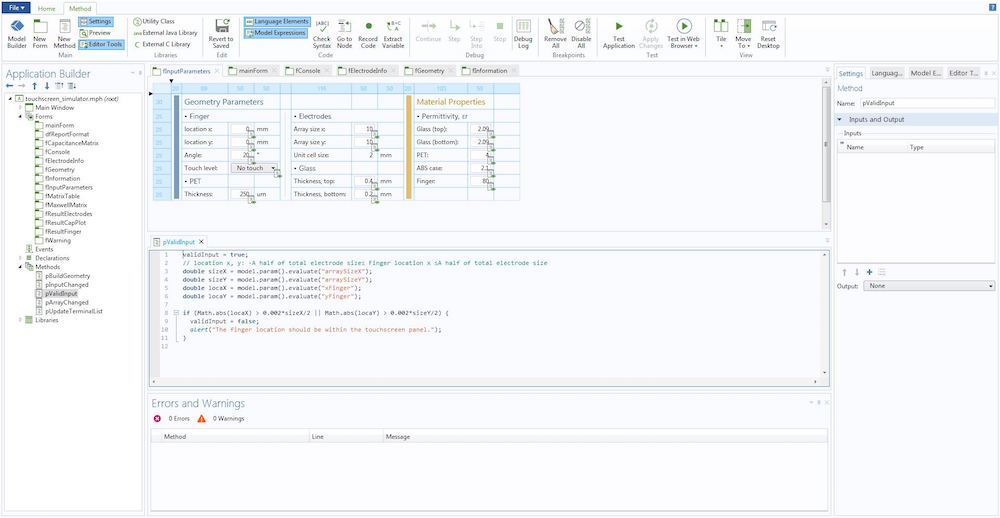
Using the Editor Tools to design an app’s interface and add advanced functionality.
By hiding the complexity of a model behind an easy-to-use interface, you can open up simulation capabilities to a much larger number of people, with the safety of knowing that their results are accurate. This collaborative workflow helps to deliver high-performance products at an accelerated rate.
Note on accuracy: An essential step in any finite element modeling process is amesh refinement studyto check that the mesh density being used is sufficiently fine and returns results of the desired accuracy. As the app designer, you will want to carry out such a study and thereby ensure that the mesh setup in the app is appropriate in this sense for the geometries that could be generated by the various user-defined parameters. Naturally, this must be taken care of before the app is distributed to end-users.
The screenshot below shows the custom UI that was built for our Touchscreen Simulator app, as created by my colleague Jiyoun Munn. The interface, as you can see, is formatted into a logical fashion, and the app can be broadly separated into four regions. Here’s a look at a typical workflow for simulating a touchscreen device using our app.
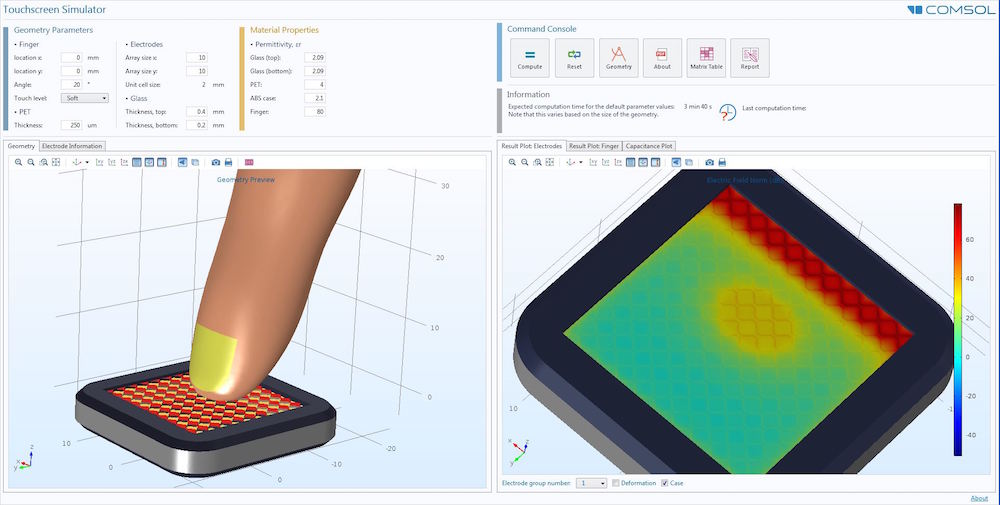
UI for the Touchscreen Simulator. Note how the designer has set up an intuitive layout separated into logical sections.
Setting Up the Geometry and Materials
As mentioned earlier, with apps, you have the flexibility to include only those inputs that are important to the simulation at hand. The screenshot below shows the parameters added to our example. They include the number of electrodes in thex– andy-directions, the properties of the dielectric layers and the properties of the finger, and the hardness of the press. The app user can modify these parameters by simply typing in the appropriate numbers or selecting an option from the drop-down menu. Note that the unit cell size (approximately the space allocated to each electrode) cannot currently be modified, but as the app designer, you could alter the app’s layout to make this form editable.

The various parameters included in the app’s layout, including two different modes of input (input boxes and drop boxes).
The Command Console
TheCommand Consoleis the nerve center of the app. Here, you can implement buttons that let users access a subset of the vast functionality of COMSOL Multiphysics, tailored to the particular problem that they need to solve.

TheCommand Console, with some advanced warning functionality highlighted.
During the design workflow, you’ll return here multiple times to make use of features. For now, you’ll want to rebuild the geometry with the new parameters that were provided in order to perform some checks before committing yourself to the full calculation. Note that you can add a helpful orange warning triangle to remind users if they haven’t yet rebuilt the geometry since last updating the design.
Viewing the Geometry and Electrode Layout
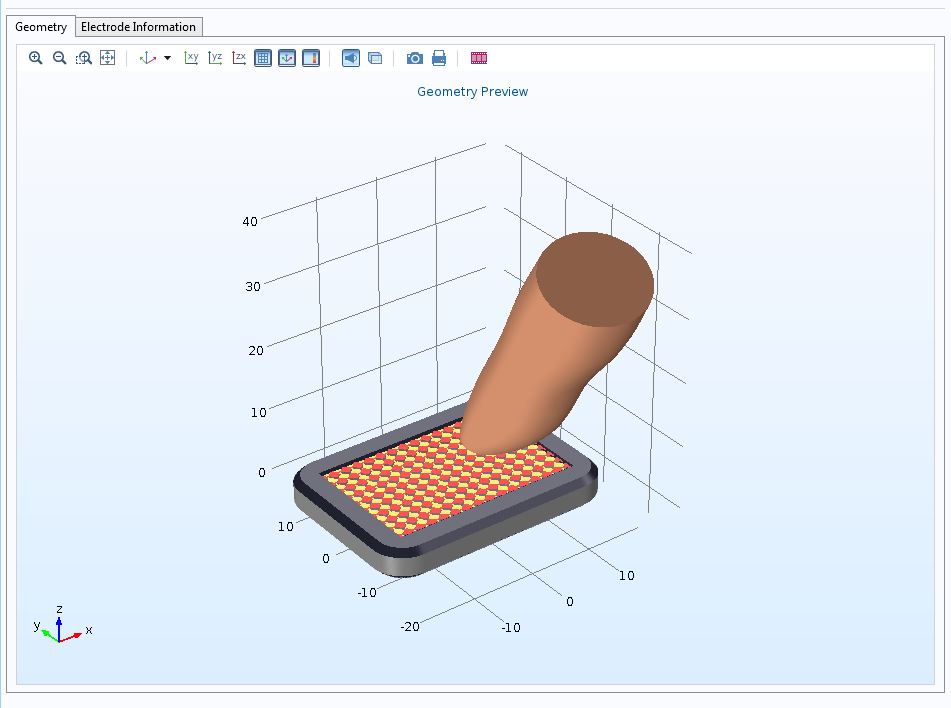
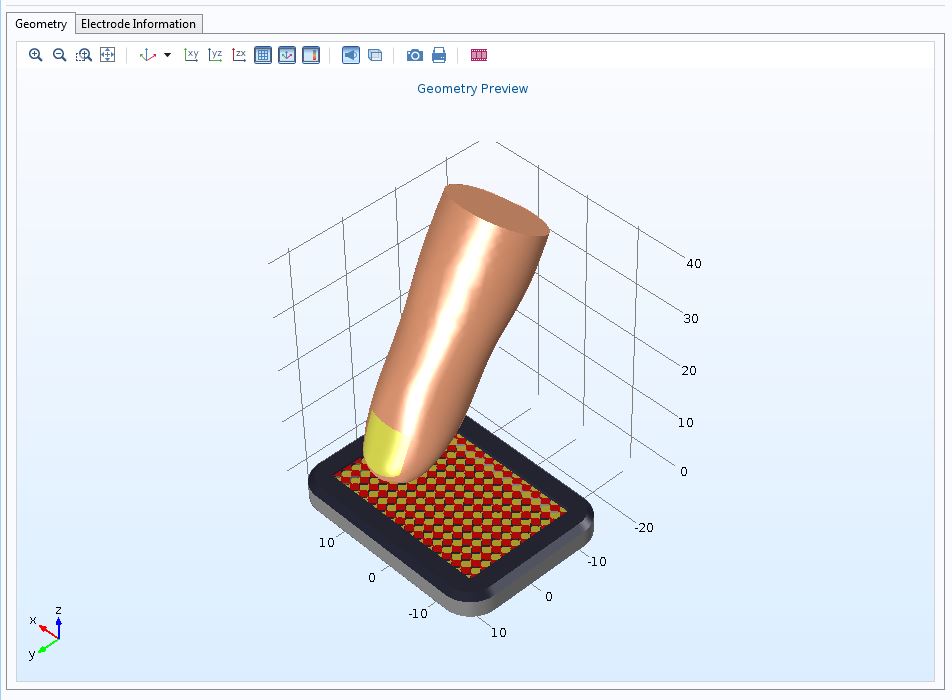
Let’s now select theGeometrybutton. As you do so, the following graphics of your touchscreen device will appear.
Results after selecting theGeometrybutton. You can rotate, zoom, and pan to a view from any angle.
Of course, in any modeling processes, validation is key. The user might wonder: Is the geometry that I set up according to these parameters the one that I want to investigate? The two tabs in this area of the app’s interface showcase how users can double check their geometry. You can also add custom images to illustrate and explain certain features of the app. In this case, for example, you could do so to ensure an understanding of the layout of the electrodes in the device and the conventions used in the numbering of these electrodes.
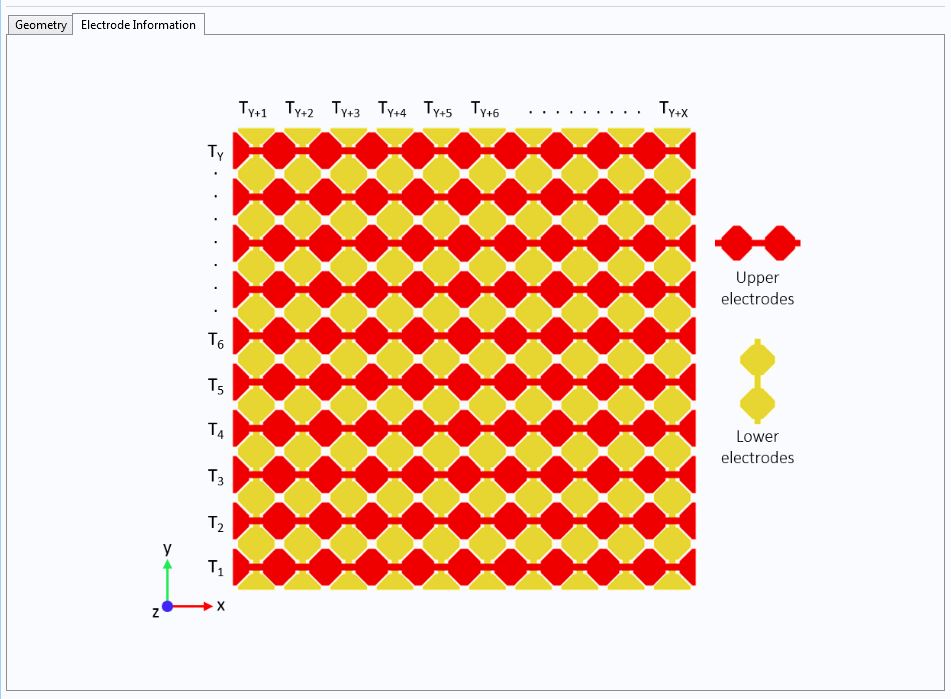
Custom images can be included to offer additional information to the app user.
Computation
Once you are satisfied, you can return to theCommand Consoleand selectCompute. The app will then calculate the capacitance between each pair of electrodes in the system. You can add a progress bar to your app to keep track of the computation, along with a time estimate (as shown in theCommand Console). Once the app has completed the calculation, the results will become available in the second graphics window located at the bottom right of the app. In fact, the Application Builder allows you to add as many different plots in as many different graphics windows as you need. Let’s have a look.
Viewing the Electric Fields
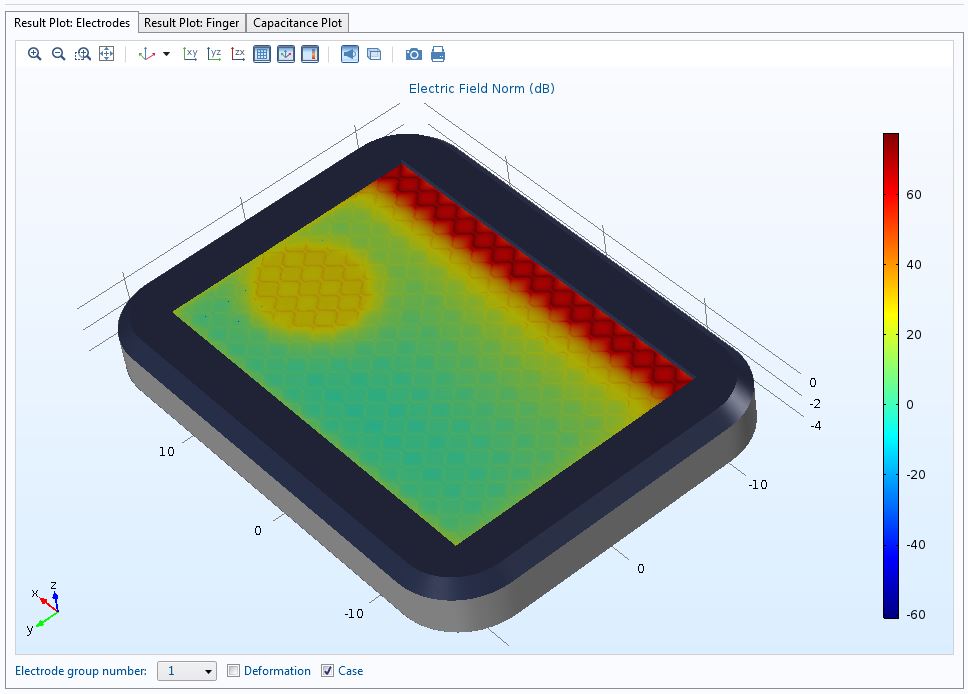
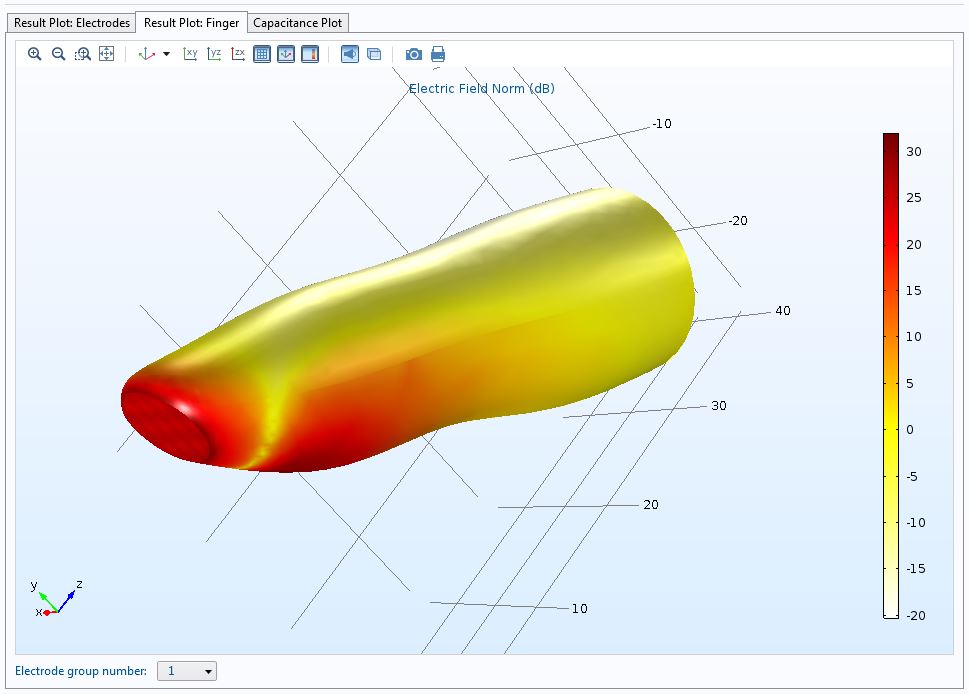
The first two tabs of the graphics window allow you to view the electric field either on and around the electrodes or on the finger itself. Focusing on the first option, there is a drop-down menu that gives you control over the electrode group for which you’d like to view the results. The screenshots illustrate just some of the customized plots and advanced plotting functionality that you can incorporate into apps.
Left: The electric fields around the electrodes. Right: The electric fields on the finger.
Scrolling through this list, you can see how each electrode has a potential applied to it in turn, just like a real touchscreen device. For some sets of results, you can even observe the characteristic disturbance of the finger, which bodes well for your sensing device. TheDeformationoption is particularly visually appealing, applying a height to the electric field plot that is proportional to the magnitude, giving you the ability to take in the results at a glance.
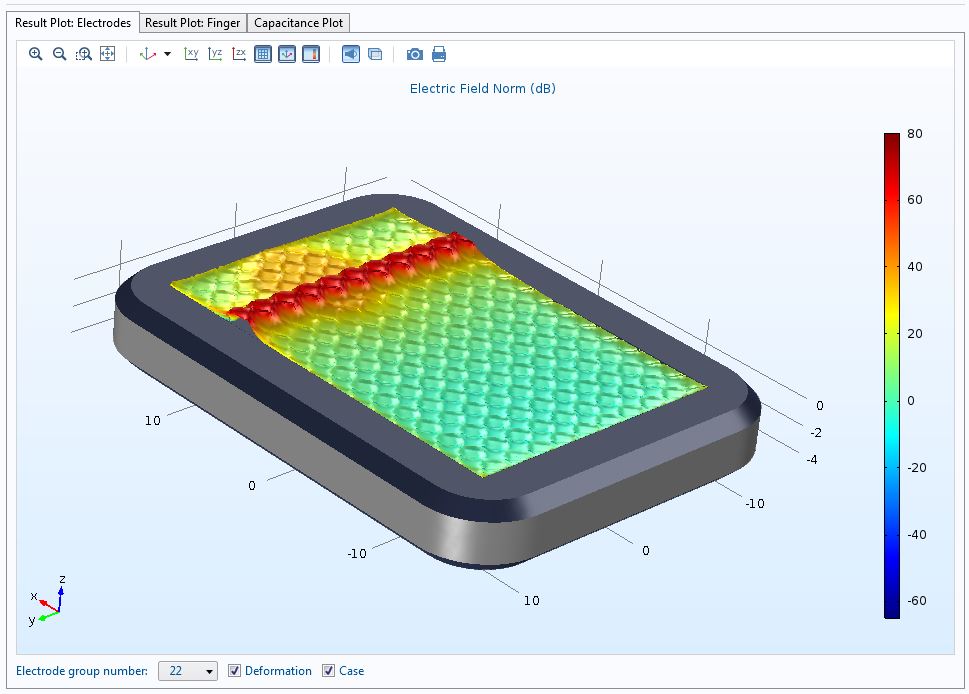
Adding a deformation to the electric field can make the results even clearer.
Extracting the Capacitance Values
You will also find a plot of the capacitance values between each electrode pair included here. It may look daunting initially, but there is no need to worry. We’ll show you how you can set up features to extract such data in a more compact and useful format.
When you return to theCommand Console, select theMatrix Tablebutton. Through a handyExportbutton, you can save the capacitance values as a table in an external file. This is far more amenable to subsequent data crushing for setting up the touchscreen control software and, with theCopy Table and Headers to Clipboardbutton, it is possible to move your data quickly between programs.
As explained in the blog post we referenced earlier, there are two different types of capacitance matrix: theMaxwell Matrixand the(Mutual) Capacitance Matrix. While the Maxwell Matrix is the one computed automatically by COMSOL Multiphysics, the (Mutual) Capacitance Matrix is often the one of interest in touchscreen design. The latter type is generated in our example app via a method — a demonstration of how you can add advanced functionality to apps to get exactly the results you need.
A Final Time Saver
Another feature, which may have already caught your eye, is theReportbutton. This option can be used to automatically generate reports based on the simulation results from the app. Whether you need your results for further consideration or want to generate some images for a presentation to the project leader, reports can serve as a helpful resource.
With just one click, you can produce a report in HTML or Microsoft® Word software. The report automatically generates a table of contents, while noting all of the relevant model parameters, its setup, and the key results. You can choose the additional contents and the level of detail that are included beyond that.
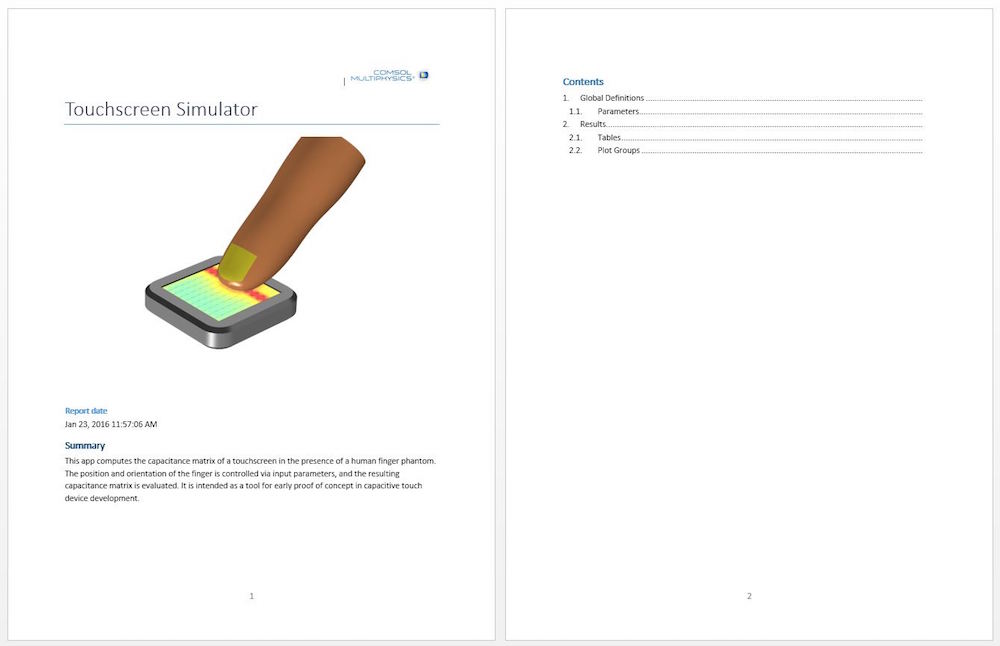
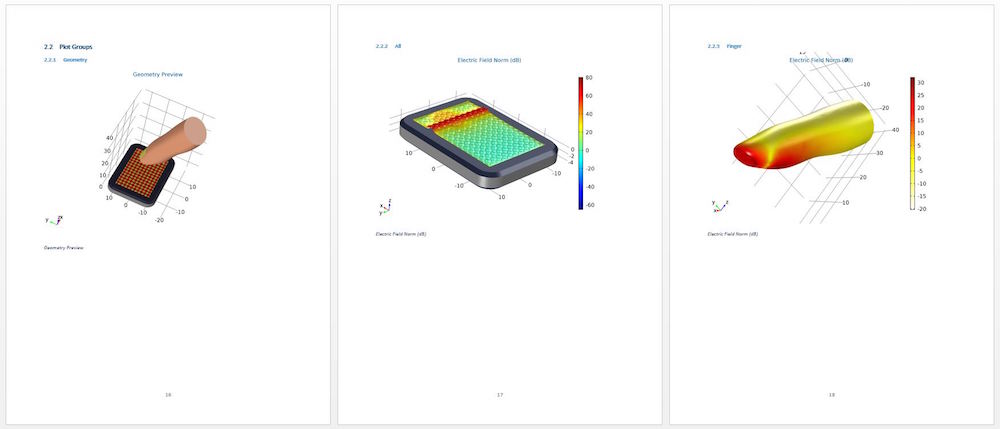
Sample pages of a report created by our touchscreen app. You can control the level of detail contained in these automatically generated reports.
Learn More About Apps and Their Role in Touchscreen Technology
- Read about how Parade Technologies is designing apps for touchscreen devices inthis blog post
- Looking to get started on creating apps of your own?
- Check out ourIntro to Application Builder Videos series
- Gets hands-on experience building apps byattending one of our free workshops
Oracle and Java are registered trademarks of Oracle and/or its affiliates.
Microsoft and Windows are either registered trademarks or trademarks of Microsoft Corporation in the United States and/or other countries.



Comments (1)
Adrian Valencia
October 12, 2023The link for the app is broken, could reupload it, please?